0345 363 1130
 info@xchangetraining.co.uk


Adobe Lightroom is all about the Library
Lightroom is lauded by some as the panacea to photographers’ frustration with Adobe Photoshop. The promise is that Lightroom will let you spend more time shooting and less time processing photographs. At this point attention could become fixed on a comparison between the editing functions in the venerable Photoshop and Lightroom; it’s an interesting area to explore. However, the focus here is the role Lightroom can play in photography workflows, as a library management and distribution tool. Dull as this might sound this is where the true power of Lightroom resides.
Officially titled as Adobe Photoshop Lightroom, the application is a collection of seven interlinked modules. Whilst the Develop Module attracts the most interest, we are going to explore the Library Module. I’ll confess I get a strange pleasure from being organised and knowing where my stuff is. If a client asks for copies of the photographs I sent them a few years ago, ‘you know, the ones used in the magazine’; or other vague instructions, I can use Lightroom to search my photo library and quickly retrieve and resend the images.
Here’s how to become an uber-librarian. The journey begins when importing photographs or video into Lightroom.
1. Importing. In class I warn delegates not to click Import in this window, see Figure 1, until the key options have been reviewed and set. This window is used to determine how photographs and video are handled.
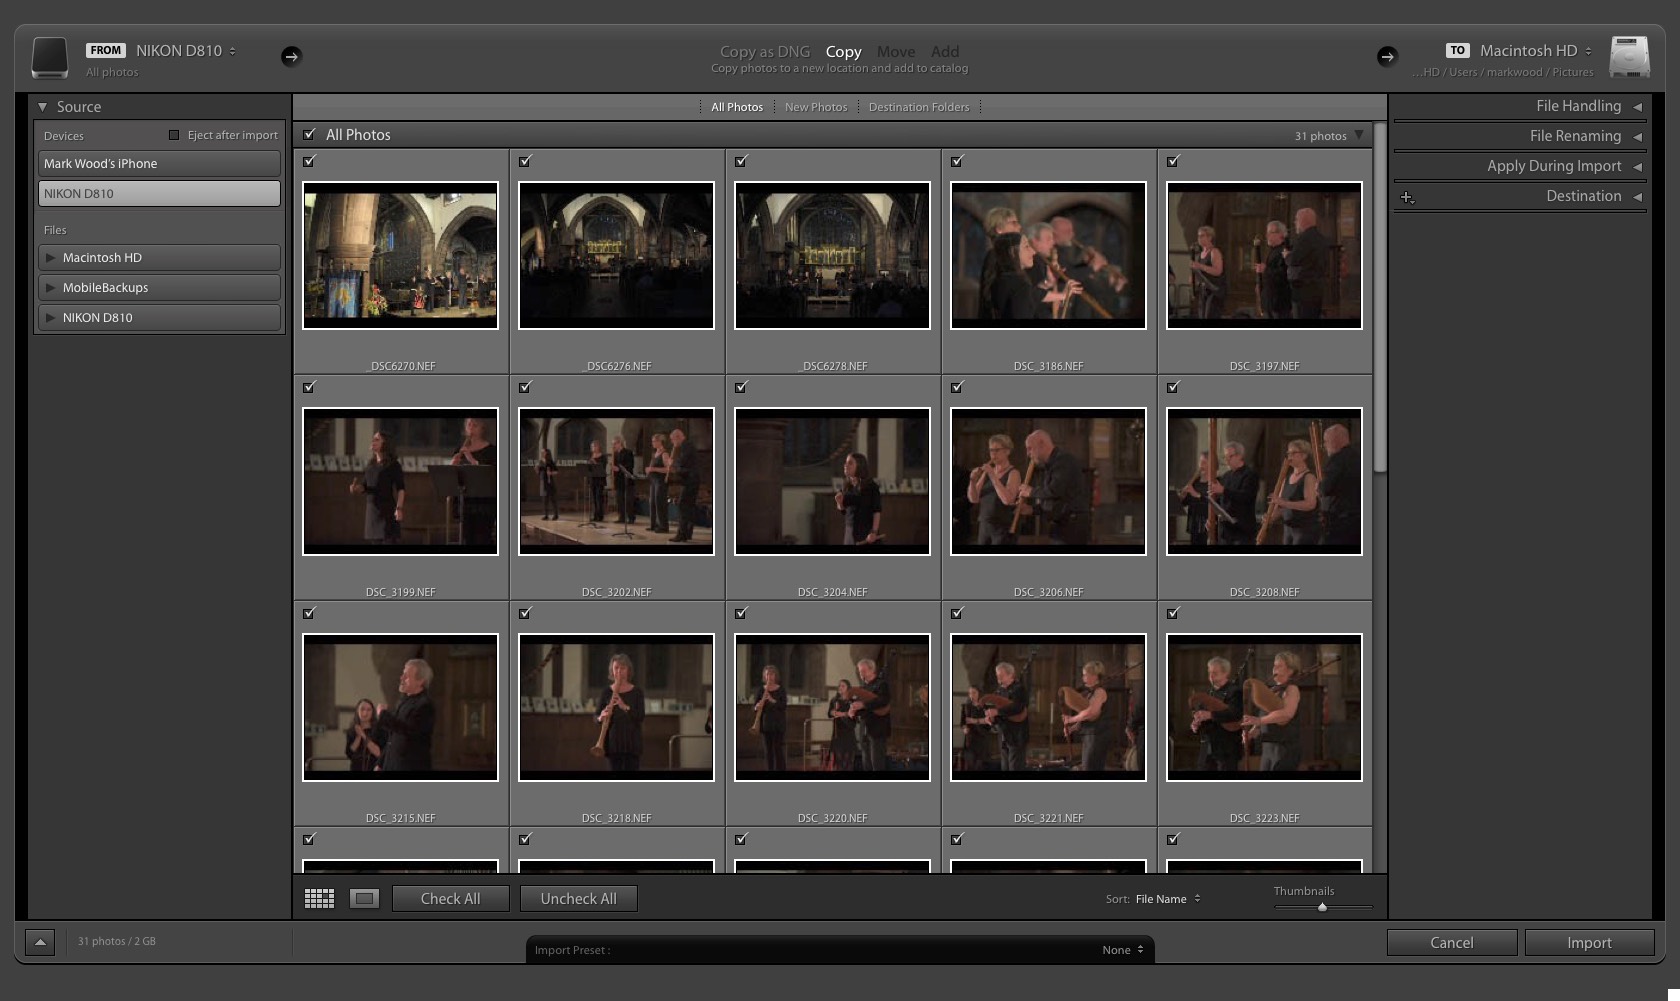
Figure 1. The Lightroom Import window. Note there are columns to the left and right of the thumbnails.
2. The panel on the right contains four groups of options, File Handling, File Renaming, Apply During Import, and Destination. Figure 2 shows that Build Smart Previews has been selected. Lightroom is a database. The application points to sets of photographs on your computer. If you store your photographs on an external drive and then disconnect that drive, Lightroom won’t be able to process those photographs until you reconnect it, unless you use the Smart Preview function. Smart Previews are extremely useful, but can lead to lost images if not handled correctly. I always use Smart Previews, in class I show delegates how to handle them properly.

Figure 2. File Handling, in the Lightroom import window.
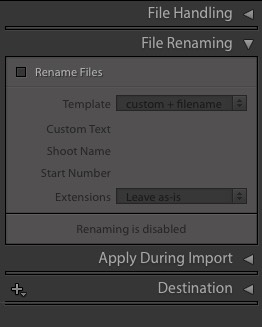
Figure 3. File Renaming, in the Lightroom import window.
3. There are no set rules for File Renaming. On import I rarely rename anything, I rely on keywords and captions to aid my cataloguing. Though should you wish the File Renaming panel is where you can change file names, add sequence numbers and similar.
4. Lightroom allows presets to be applied during import. Figure 4 shows keywords being applied. Lightroom will suggest keywords when keywords have already been used in a Lightroom catalogue. Any new keywords you add will be available for future use too. Keywords are not the only metadata that can be applied. I have set my contact details and copyright notice as a preset, labelled here mw basic copyright. This means all the photographs in this import will contain my contact data, this can be read on a wide range of catalogue software.
Processing can also be applied during import. In Figure 4 Develop Settings is set to None, but Lightroom comes with dozens of preset development looks, such as black & white, and colour film stock. You can configure you own settings, this is ideal for studio work where presets can be created for each lighting set-up you use. As Lightroom uses non-destructive editing, should you find an applied preset needs further adjustment this can be done easily.
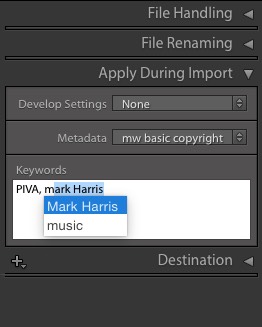
Figure 4. Presets that can be implied during Import in Lightroom.
A great deal of cataloguing and processing can be applied even before you click the Import button.
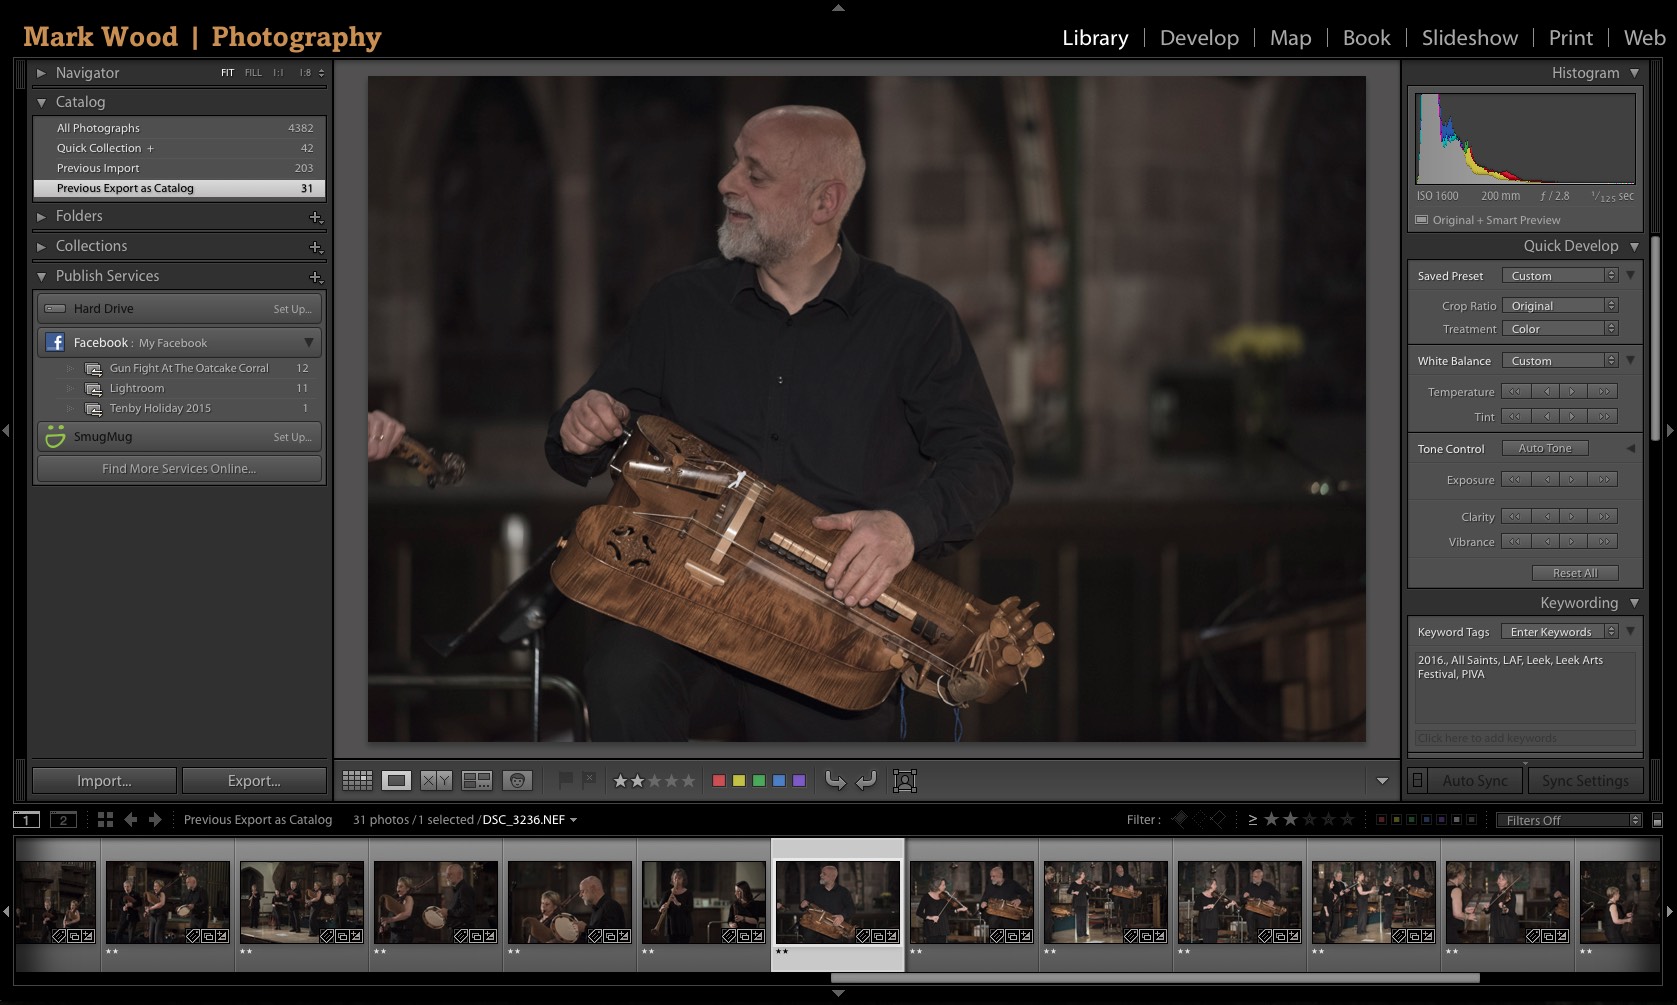
Figure 5. A typical view of the Library Module in Lightroom; panels can be hidden so this view varies depending on individual preferences.
Once your photographs arrive in Lightroom you can arrange them in Collections. It is essential to understand the difference between Folders and Collections in Lightroom.
Figure 6 shows the Folders panel, which has been expanded to show the years, 2014, 2015, and 2016. My preference is to allow Lightroom to organise my photographs and videos in date order. Therefore Lightroom has created folders based on the dates I took shots. For example if I were to expand the 2016 folders, you would see a series of sub-folders, one of each day I have photographs and video for.
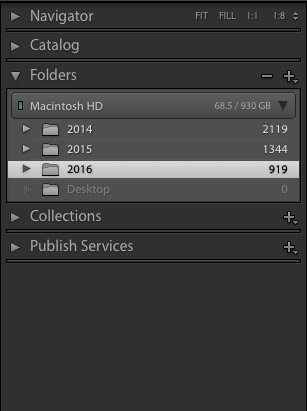
Figure 6. The Folders panel in the Development Module.
This approach to organising is useful but lacks flexibility. To gather together my best photographs I would create a Collection. A Collection can contain photographs from several Folders and is virtual; moving photographs from one Collection to another does not move the physical location on the photographs on my hard drives. Lightroom lets you create Smart Collections too, these can be based on Keywords and other metadata you’ve applied. I could create a Smart Collection for the keyword ‘music’ and five stars, resulting in all photographs labelled music and rated with five stars appearing in a virtual collection. As I add more five-star rated music photographs they too would appear in that virtual collection.
Figure 7 shows some examples of Collections. They are not Smart Collections, as these were made by dragging photographs into them, but Collections are also very useful. Note the Collection ‘Art In The Park’; it contains 20 photographs. Should the client want those resending, or forwarding to a magazine they can be easily identified and Exported with little more than a right-click.

Figure 7. The Collections panel in the Development Module.
In Lightroom, Exporting is a sub-set of Publish Services, which can be found at the bottom of the left hand panel in the Library module. Selected photographs can be exported via a right-click, though an alternative can be to use Publish Services.
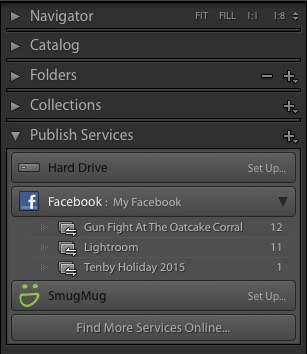
Figure 8. The Publish Services panel in the Development Module.
Figure 8 shows three publishing services, Hard Drive, Facebook, and SmugMug. By clicking the words ‘Set Up…’ on the Hard Drive section, a window would appear, see Figure 9. This window can be used to configure one or more export presets. For example you could set up a service that creates web ready JPEGs that are watermarked, or another that makes archive ready TIFFs. Once created, you drag the desired photographs into the appropriate export collection, in Publish Service panel. Right-clicking the publish collection opens a menu, from it you can choose ‘Publish Now’ to run the service.
Figure 8 shows three Facebook publishing options. I could add extra photographs to these collections at anytime, and by publishing them their respective albums on Facebook would update. Lightroom supports many third-party online services, via plug-ins.
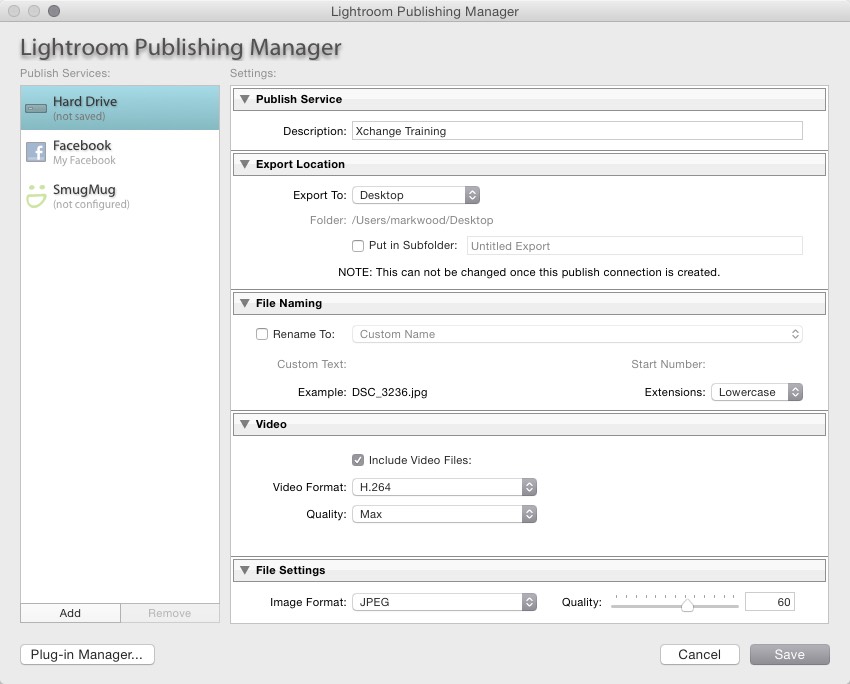
Figure 9. Lightroom Publishing Manager.
There is a lot more ground to cover in Lightroom, something I do in workshops for XChange Training. My message here is try not be seduced by the Develop module. If Lightroom has a raison d’être it should be its ability to manage photographic libraries.
If you need further information to improve your photo management skills using Adobe Lightroom visit either our Adobe Lightroom courses page or send us an email with your query.